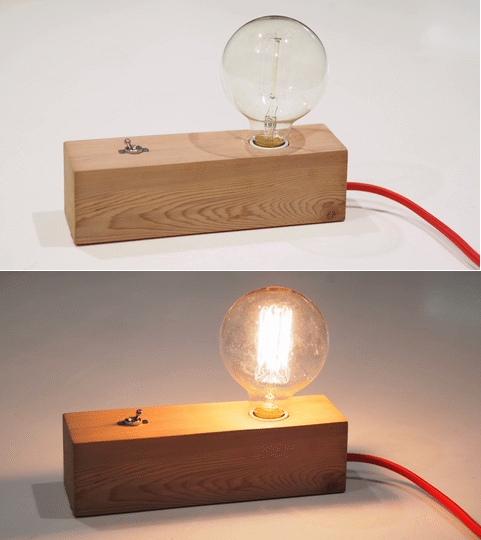
In this post, I’ll show you how to make what I call the Edison Wooden Block Lamp. So yeah, it’s a lamp made from a block of wood, paired with a vintage Edison bulb. Hey, it looks cool.
This vintage looking lamp has an industrial yet modern design. I made this lamp from a scrap piece of wood (4×4 cedar post) and readily accessible lighting supplies. Hope this will inspire you to create your own!
MATERIALS USED
- Toggle switch
- Porcelain lamp socket
- Vintage light bulb
- Fabric extension cord
- Adhesive felt paper
- Wire connectors
- Electrical tape
TOOLS USED
- 35 mm Forstner bit
- 1/2″ spade bit
- 3/8″ drill bit
- Wire stripper
- Combination square
- Drill
- Router table
- Router bit
- Bench cookies
Make the Wood Base
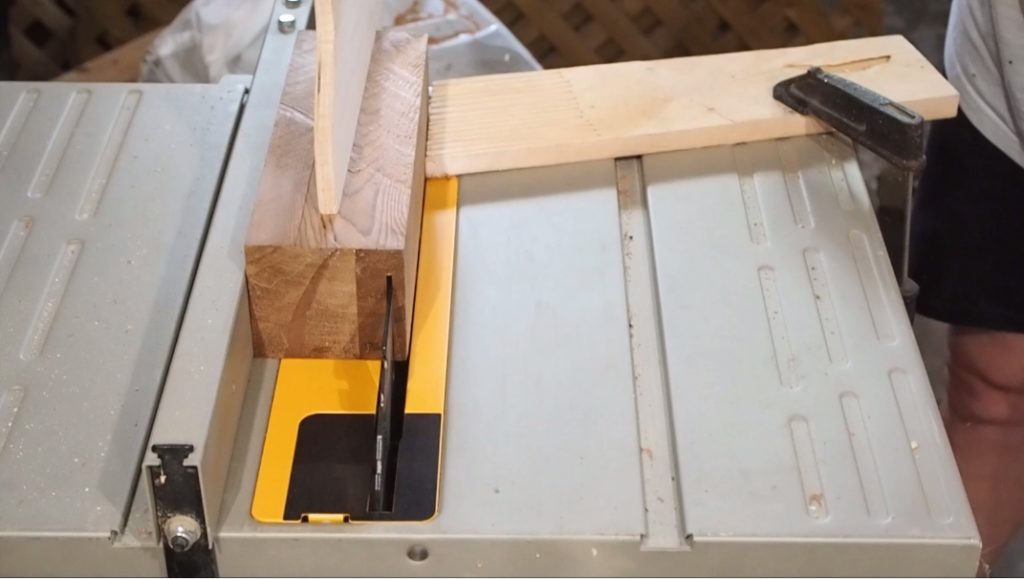
I started off with a left over piece of 4×4 cedar post. In order to get a more sophisticated look, I trimmed off all the rounded edges of the 4×4 using my table saw, then sanded the block to a smooth finish. My final dimensions were approx 3 x 3 x 9 inches.
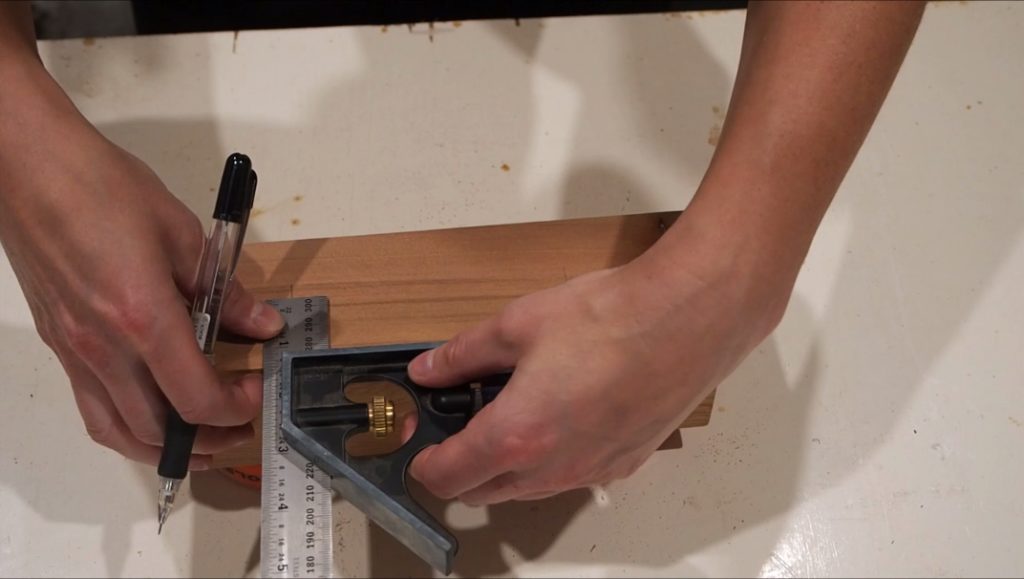
I measured and marked 2-1/2″ from the center of the short edge. I did this on the top and bottom face of my block, making a mark on both the left and right sides. So in the end I had 4 marks in total.
Drill the 35 mm Holes
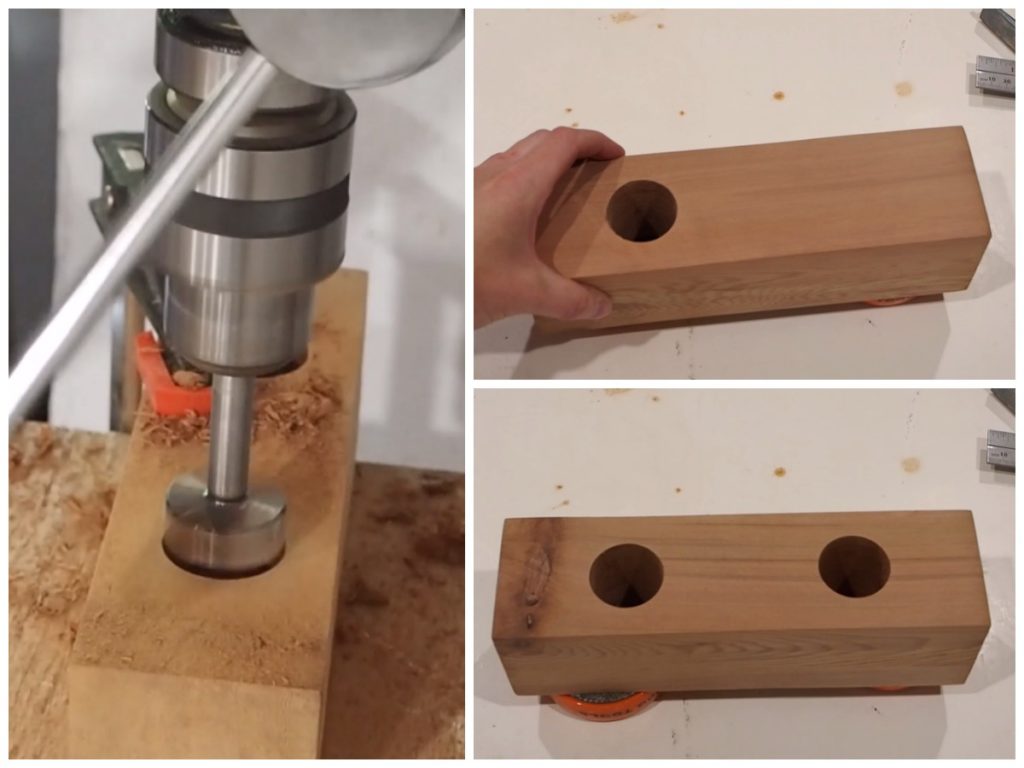
Drill one of the marks on your bottom face with a 35 mm Forstner bit. Don’t drill all the way through! You need to drill almost all the way through, but not quite. Use your drill press’ depth stop or regularly check your progress if using a hand drill. You should aim to leave no more than half an inch of wood at the bottom of the hole.
Flip over the block so the top face is facing up. On the opposite side from hole #1, drill where you marked, again using the 35 mm bit. This time drill all the way through.
When you’re done, your block should look like the pictures above.
Drill a Few More Holes
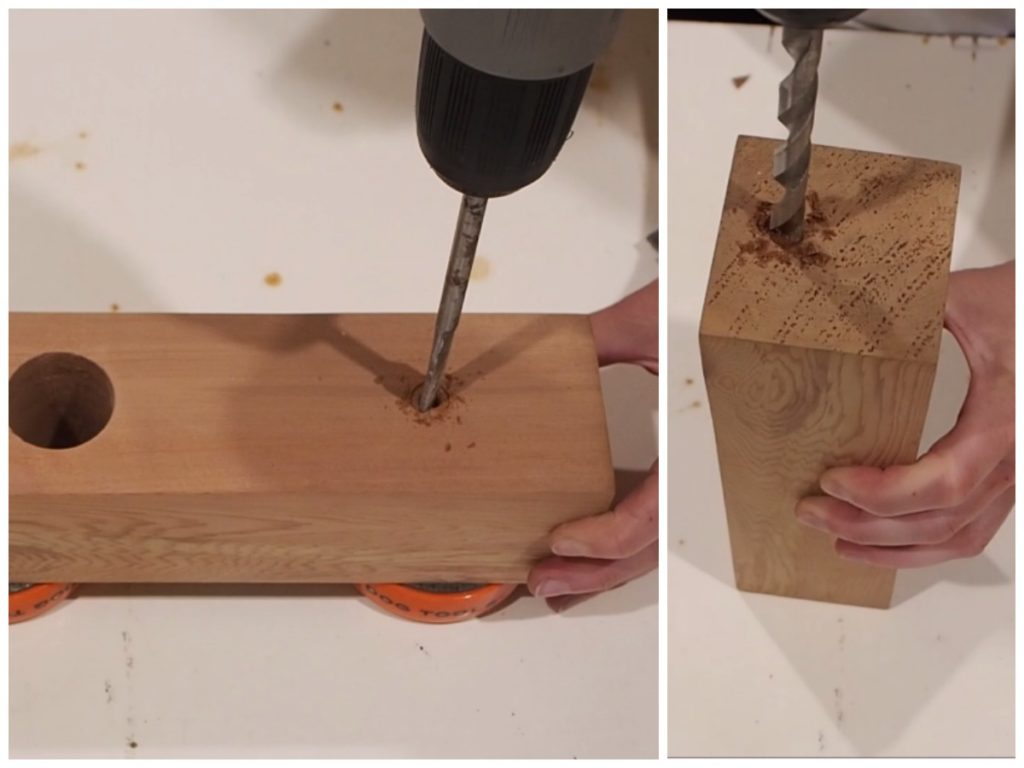
On the last mark that remains, use a 1/2″ spade bit to drill through. The hole will connect with the larger 35 mm hole that you made at the last step. Awesome!
The last hole that needs to be made is on the side face. This is where the wiring will enter the base. I used a 3/8″ bit that seemed to be a good size for the fabric wire I planned to use. Note: drill towards the bottom of the face and drill all the way until you reach the 35 mm hole (the one that goes all the way though).
Find this confusing to read? Watch the video
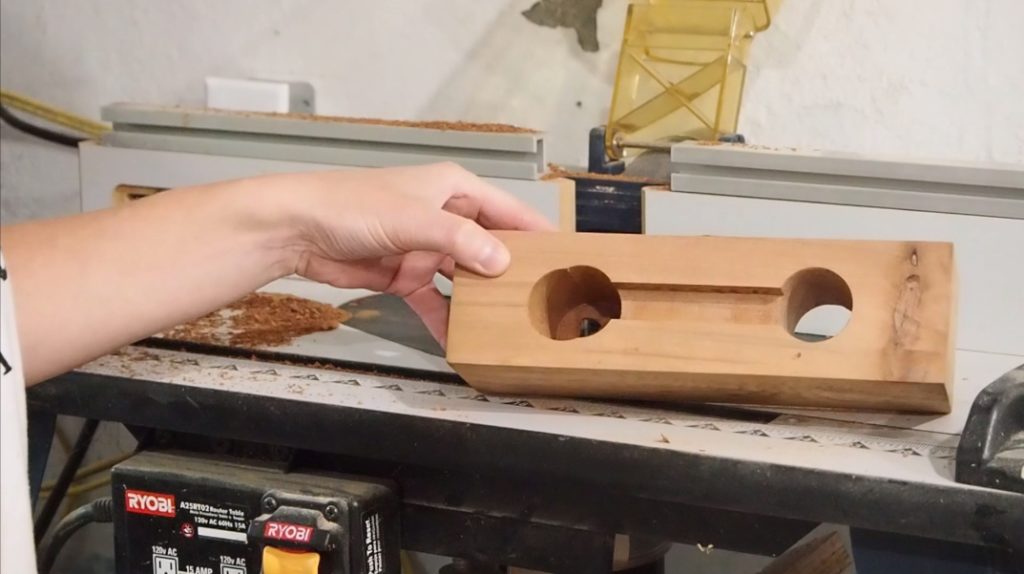
The last step in preparing the wood is to make a channel between the holes on the bottom face. I used my router table for this with a 3/4″ straight bit.
Lamp Wiring
Now that all the holes are made, we can start assembling the lamp.
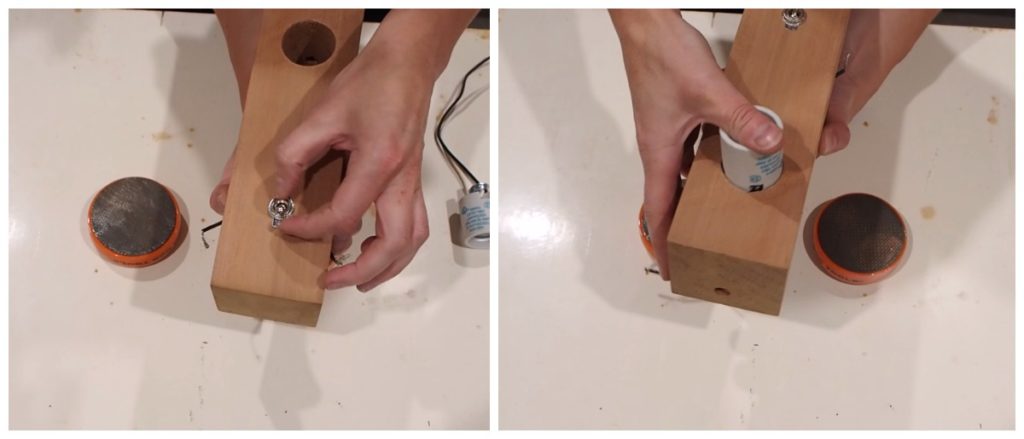
Start with the toggle switch. Remove the outer ring and the “on/off” plate, then slip the switch up into the smaller 1/2″ hole from underneath. Replace the “on/off” plate, and screw the ring on tightly.
Next, simply slip the porcelain socket into place from above. It will be a nice snug fit.
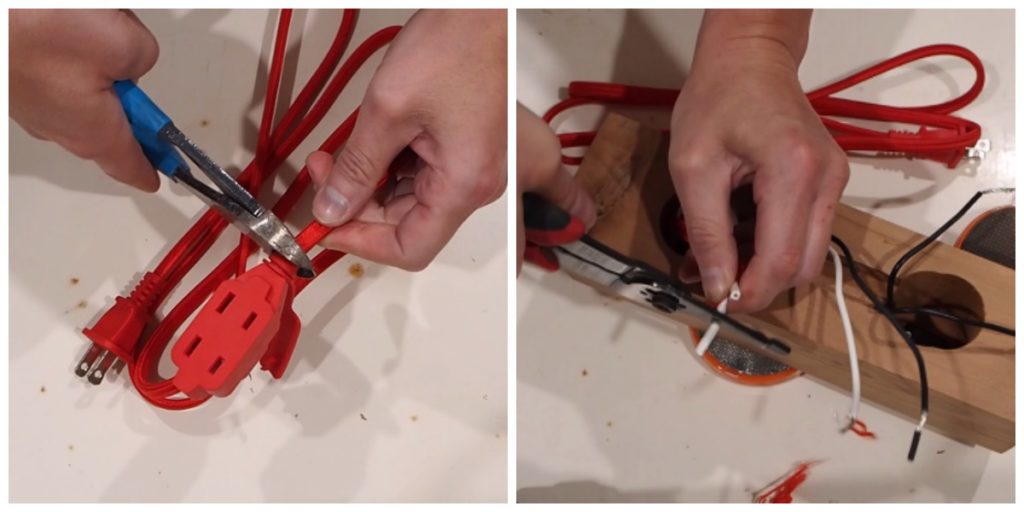
Grab your extension cord and some wire cutters. Cut the wire just before the “female end” (i.e. the piece where you can plug other stuff into). Slide the end through the small hole you made on the side. Note: use your wire strippers to remove about 3/4″ of sheathing from the extension cord’s wires.
If you look closely, you will notice that the 2 wires are different: one is smooth and the other one is ribbed. The smooth wire is the “hot” wire and the ribbed wire is the “neutral” wire.
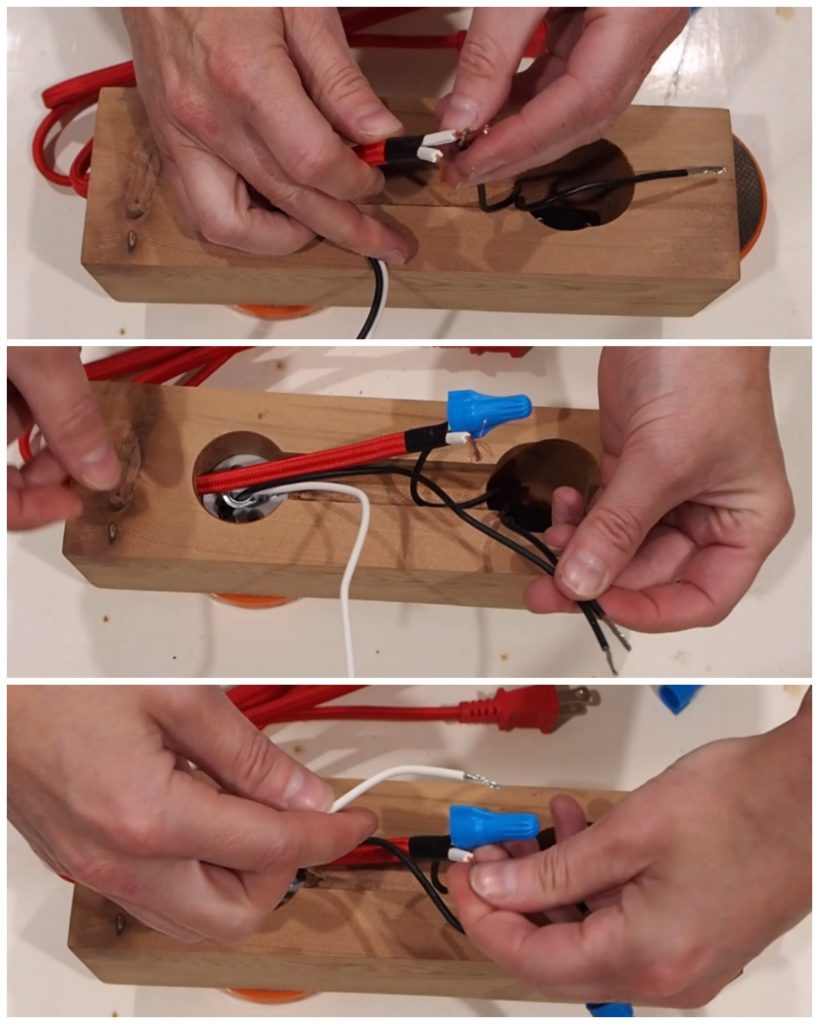
Start with the smooth “hot” wire and connect it to one of the leads from the toggle switch using wire connectors. The connect the other lead wire from the toggle switch to the black lead wire from the socket. Finally, connect the white wire from the socket to the ribbed “neutral” wire.
Final Touches
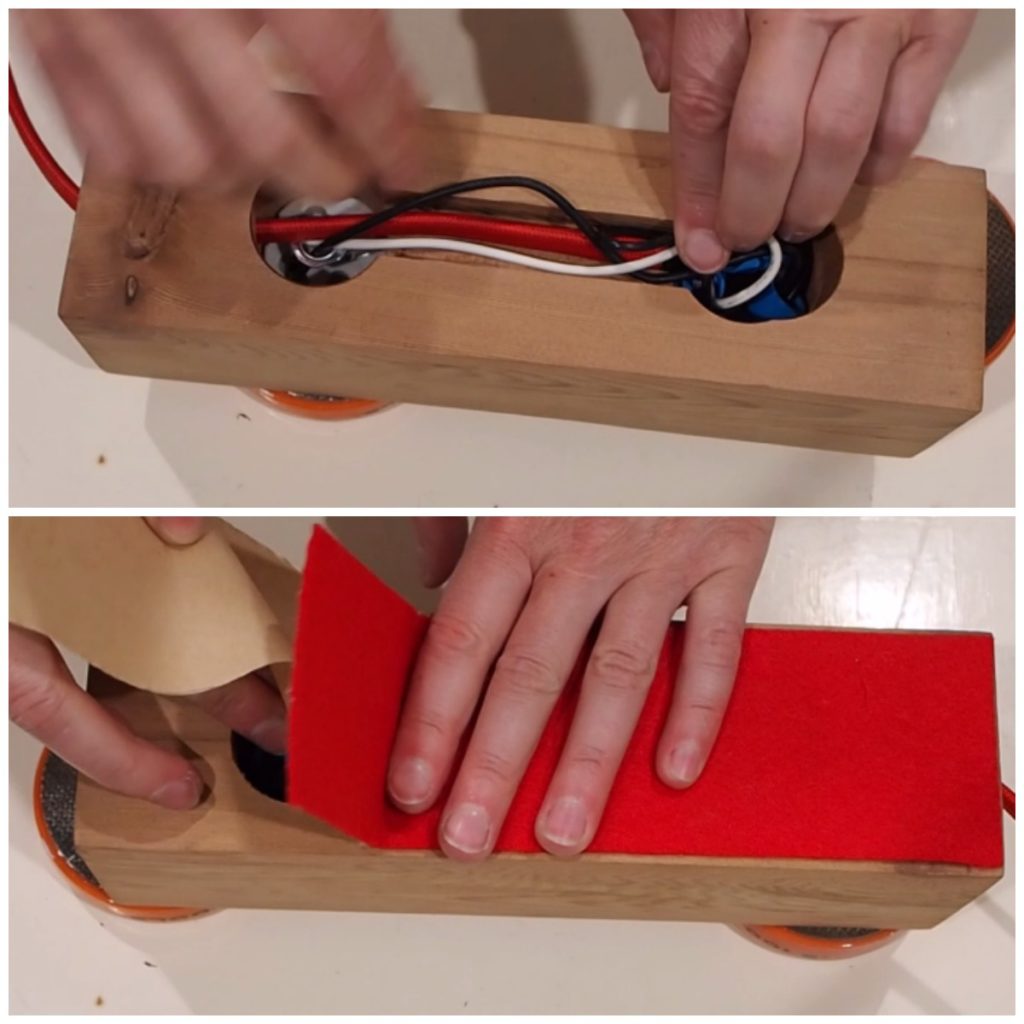
To give your lamp a more polished look, cover the bottom with a piece of adhesive felt. I used red to match my fabric extension cord. Tip: you can use a piece of duct tape instead to keep the wires from coming out.
All that’s left is to screw in the vintage light bulb of your choice. I used an over-sized vanity tungsten bulb. I just love the look.
If you haven’t already done so, you can watch the build video
You can also check out my YouTube channel for more DIY videos.
