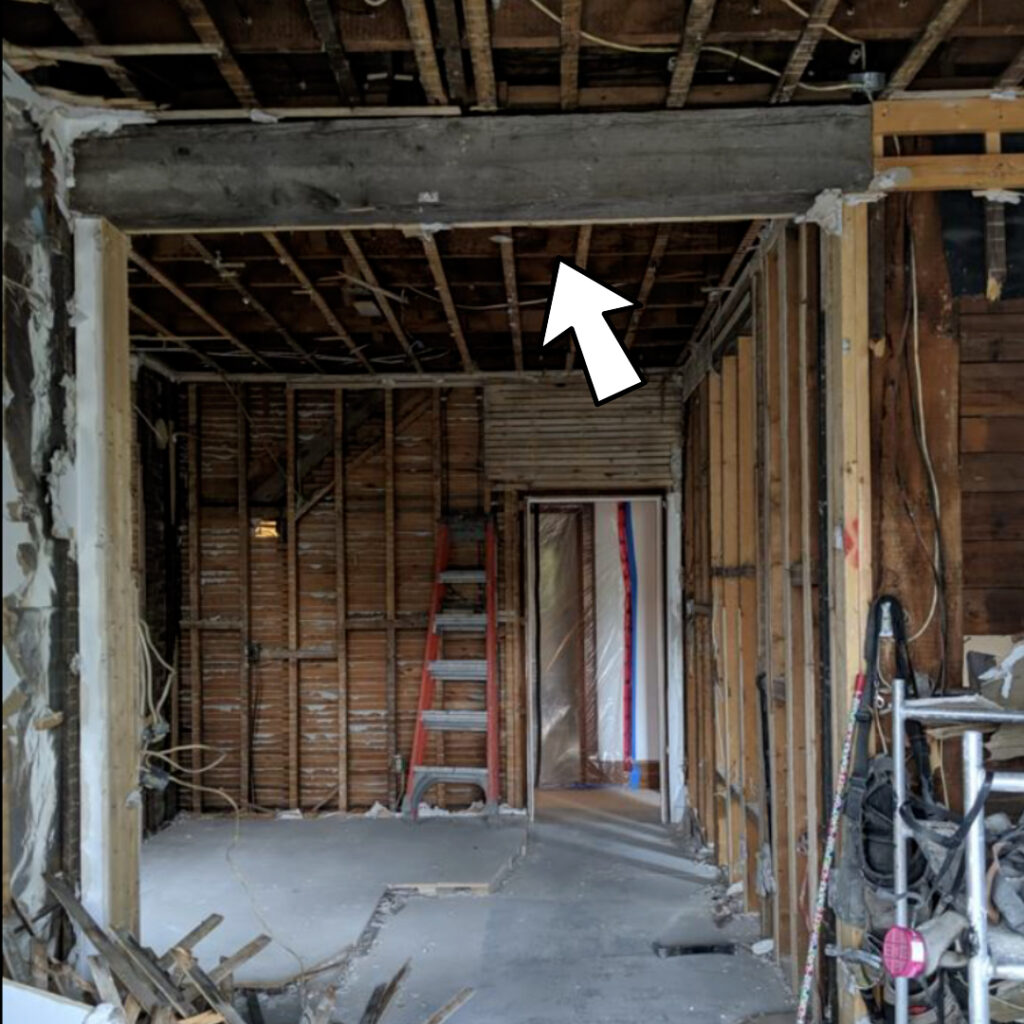
I’ve had this old timber beam in the corner of my shop for almost 2 years now, just waiting to see some action. I salvaged it during some major renovations I did a couple years ago. We had some walls removed to create an open concept between my kitchen and dining room. This was actually a structural support beam in the ceiling that was replaced with a steel beam. I just couldn’t resist holding onto it, thinking one day I’ll come up with a really cool project idea.
Not being quite sure what I was going to do with it, I tucked it away in a corner until inspiration finally struck. The idea came when I was over at my friend’s father’s house one day and he had built a really cool looking stump table out of an old barn beam. I immediately knew that was exactly what I was going to build.
Building Furniture From an Old Timber Beam
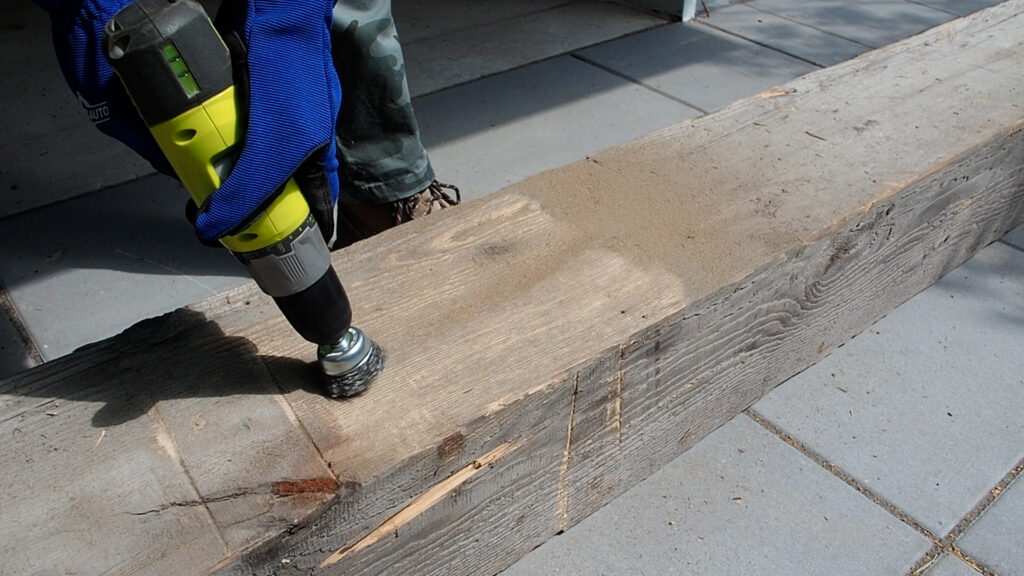
Step 1: Clean Timber Beam
Working with old timber beams means you’ve got to put a little extra work into it. First, you’ll want to remove any old nails from the wood. Then you can clean the wood using a wire brush. It will be a lot easier if you use a wire wheel attachment on an angle grinder or your drill, like I did.
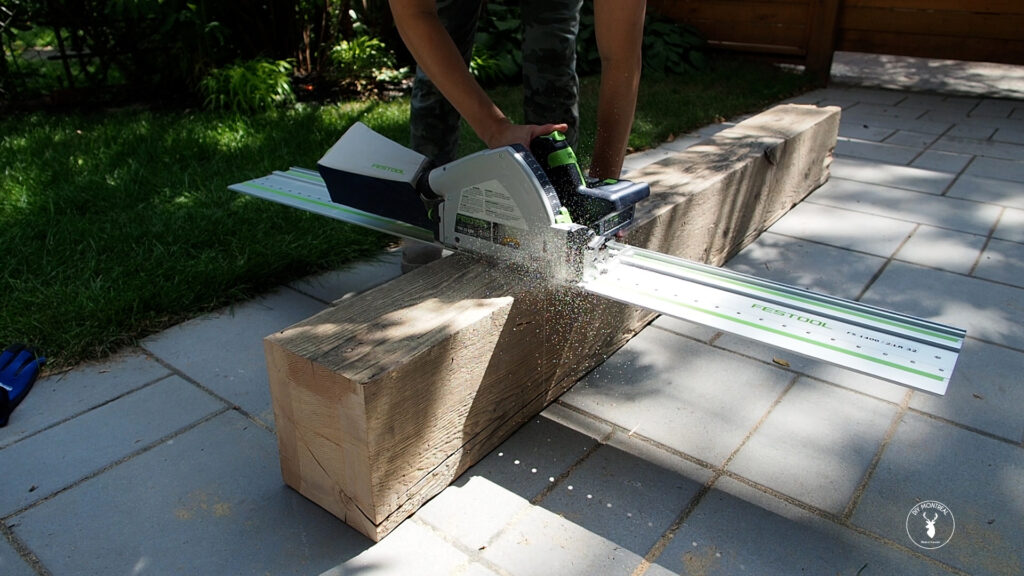
Step 2: Cut Timber Beam
Now that the wood is clean, it’s time to cut the pieces to size. If you have a chainsaw (I sure wished I did!), have at it. Otherwise, you can use a combination of saws to get the job done. I started with my track saw, scoring as deep at it would allow on all four sides. Afterwards, I could then finish the cut with a rapid pull saw.
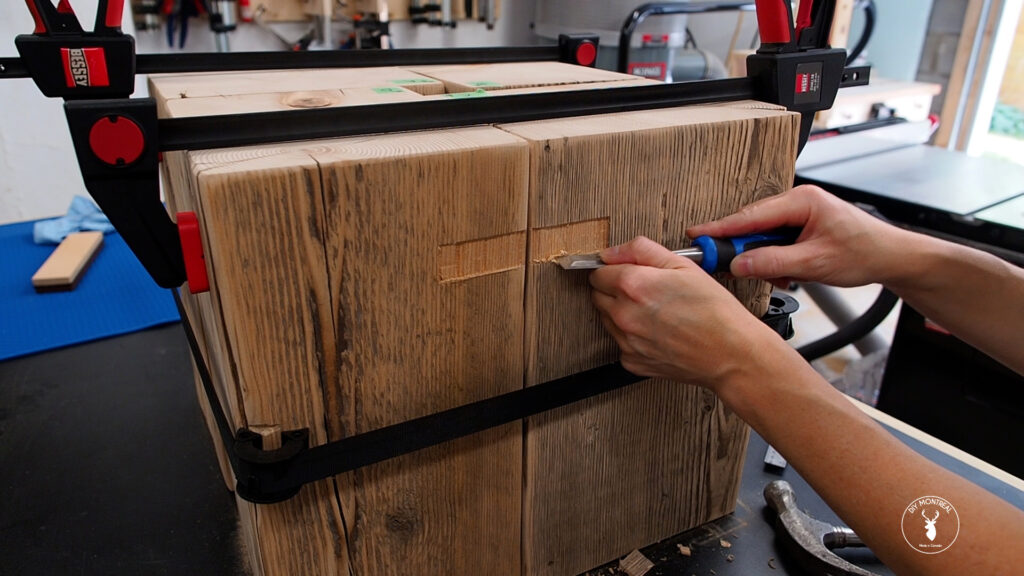
Step 3: Assemble Stumps Into Table
Now that the stumps were cut (I know they’re not technically stumps but I like to call them that) I cleaned the wood some more with my sander. With that done, I can assemble the stumps into a table formation. For this, I used a chisel to carve a notch where I would insert flat metal connector plates.
Step 4: Apply Finish to Table
To finish the side table, I went with Polycrylic, which is a water-based polyurethane. I wanted a non-yellowing durable finish that dried quickly and wouldn’t require working outdoors (this thing weighs a ton to move!). Using a foam brush, I applied several coats of poly.

I really love the history of this piece. Not only did I build it with my own hands, but it was once a part of this house within the walls, and now it will live on a piece of furniture within the same house for years to come.
