Back by popular demand! Today, I’m excited to share 10 more woodworking basics that every woodworker should know. In a previous video, I covered 15 essentials, and you’ve asked for more—so here we go. If you haven’t seen the first video, I recommend watching that first. Now, let’s dive in!
1. How to Change Any Saw Blade
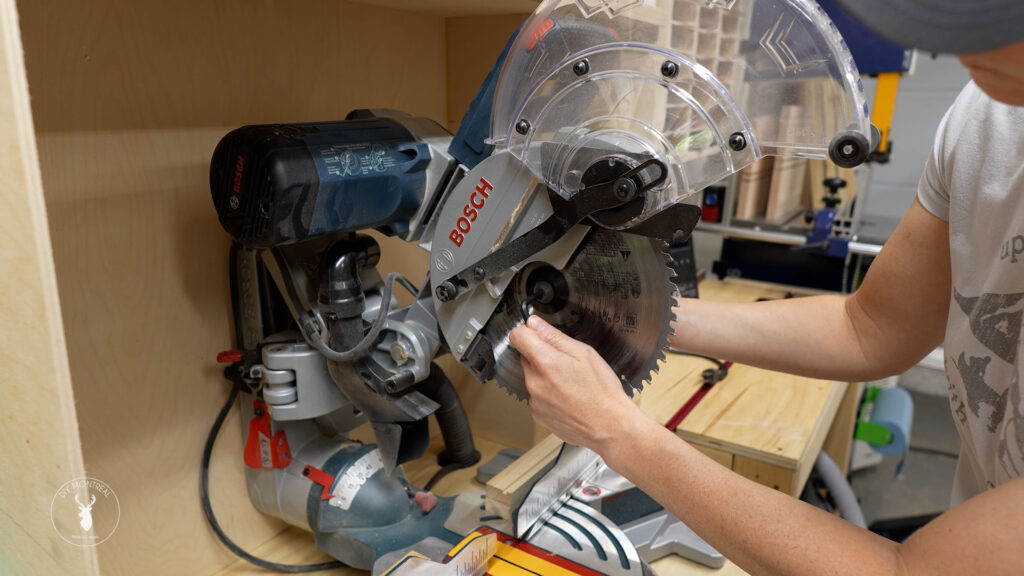
This might seem basic, but it’s worth covering. When I first started, I avoided changing saw blades as much as possible. The fear of not loosening the blade or tightening it enough—worrying it might fly off—kept me from doing it. Sound familiar? Here are two tips to ease your mind:
- Loosening the Blade: Always remember that nuts loosen in the direction the blade rotates. When you question which way to turn, just follow the blade’s rotation direction.
- Tightening the Blade: To tighten, go opposite the blade’s rotation. You don’t need to overtighten; the saw’s rotation will help keep the nut secure. A snug fit is all you need. Trust me, you’ll appreciate this tip the next time you need to swap out a blade.
2. How to Find the Center of a Board
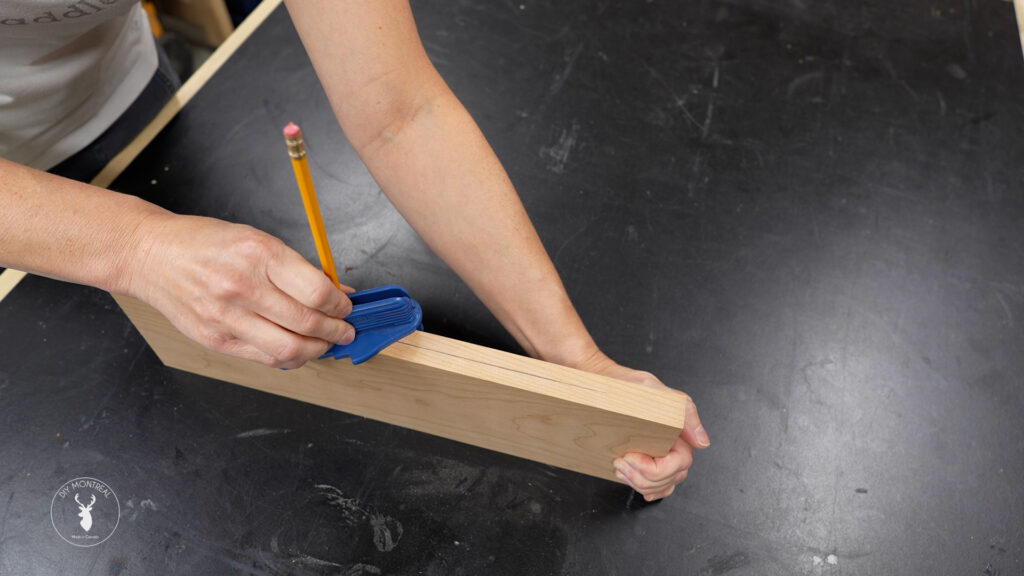
Finding the center of a board is something every beginner should know. You could measure and divide by two, but here are a few tricks that make it easier:
- Self-Centering Scribe Tool: Simply place a pencil in the tool’s center hole, set the scribe on the board, and twist it until the stops hit the sides. Run it along the board, and voilà—perfect center.
- Speed Square Method: For wider boards, use a speed square to draw a line across the width, then draw 45-degree diagonals. Flip the square and draw again—X marks the spot!
- Ruler Method: On even wider panels, use a ruler or tape measure, pick two even numbers, and mark the midpoint. Easy, no math needed!
3. Secure Wood Trapped Between the Blade and Fence (or Stop Block)
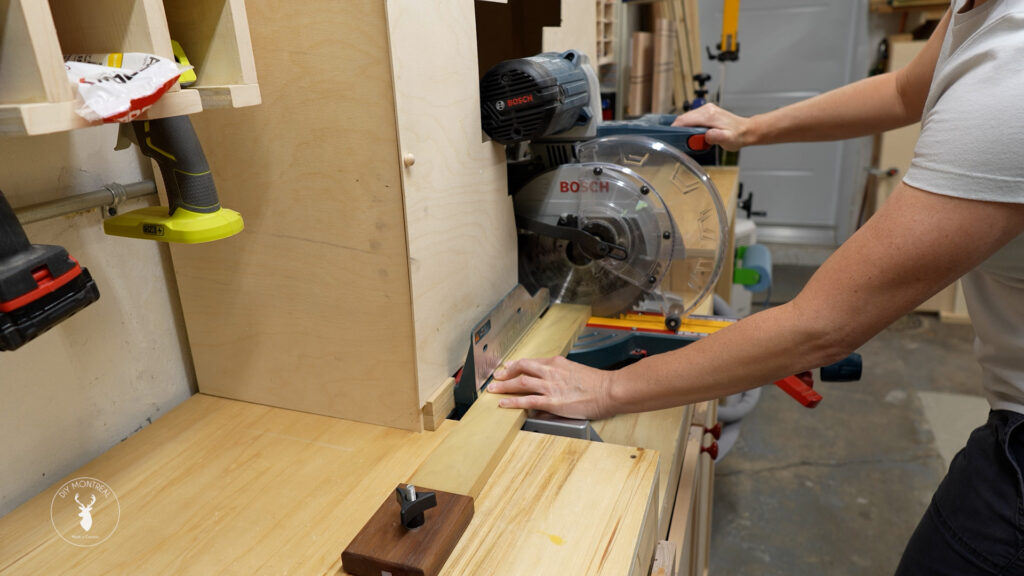
This might sound odd, but it’s a key tip for avoiding kickback. That piece of wood trapped between the blade and a hard place (i.e. fence, stop block) needs to be held down securely, all while keeping your fingers at a safe distance.
- At the Table Saw: When cutting at the table saw, wood trapped between the blade and fence is at risk of kicking back. Always stand slightly off to one side to avoid being in the path of any potential kickback. Push blocks or sticks are great for keeping your fingers safe and holding down the wood to minimize kickback risk.
- Patience at the miter saw: When using a miter saw, always wait for the blade to stop spinning before lifting it back up to prevent the blade from catching the wood and causing kickback. Using stop blocks at the miter saw can also lead to kickback, so make sure the piece of wood between the stop block and the blade is held down securely.
- Use a Crosscut Sled for Small Parts: For small pieces, use a crosscut sled on the table saw. It provides better support and control, reducing the risk of kickback. I like to use the eraser tip of a pencil as a push stick when cutting small part on a crosscut sled.
4. Prevent Drill Bit Wander
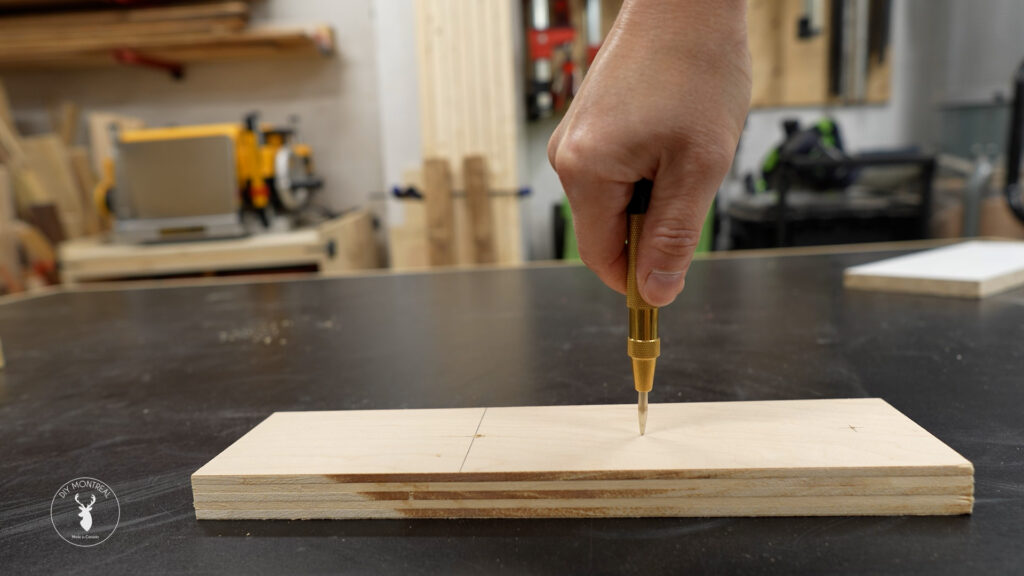
When drilling, the bit might wander from the intended spot. Here’s how to stop that from happening:
- Use Brad Point Drill Bits: These bits have a pointy tip that helps prevent wandering.
- Use an Awl or Center Punch: An awl makes a small indentation where you want to drill, guiding the bit. For harder surfaces, a center punch works similarly but with more force, ensuring your bit goes exactly where you want it.
5. Milling Lumber—Why & How
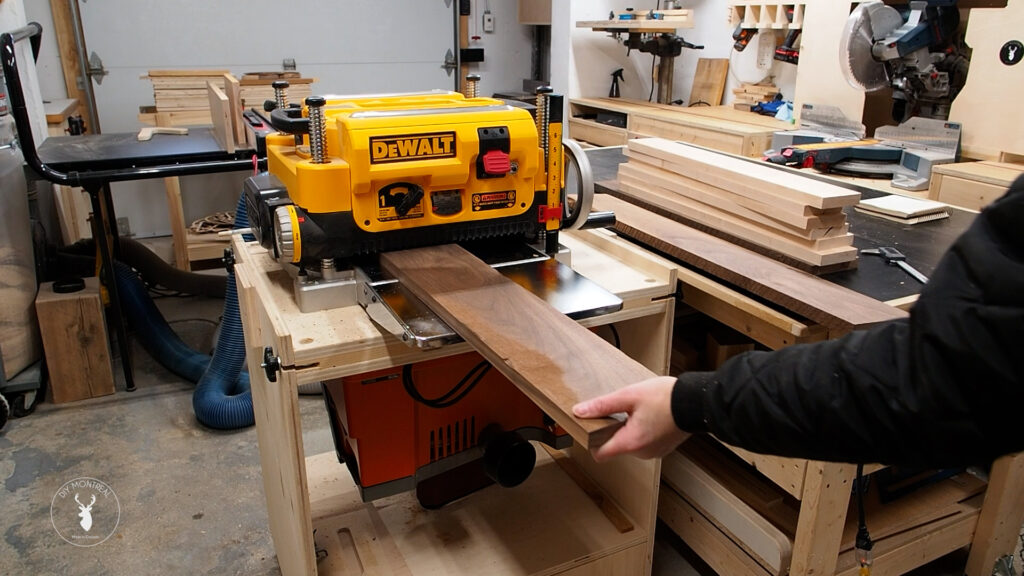
Why mill your own lumber instead of buying finished pieces? Here’s why:
- Control and Precision: Store-bought lumber may not be perfectly flat or square anymore, especially after sitting for a while. Milling your own lumber gives you control over the quality and dimensions.
- Cost Savings: Rough lumber is significantly cheaper than finished lumber. You can save a lot by doing the milling yourself, especially if you need custom sizes or thicker stock.
Milling Process in a Nutshell:
- Flatten one face on the jointer.
- Flatten one edge on the jointer, making it square to the face previously flattened.
- Run the board through the planer to flatten the opposite face.
- Trim the final edge on the table saw to square it up.
6. Break Those Perfectly Square Edges
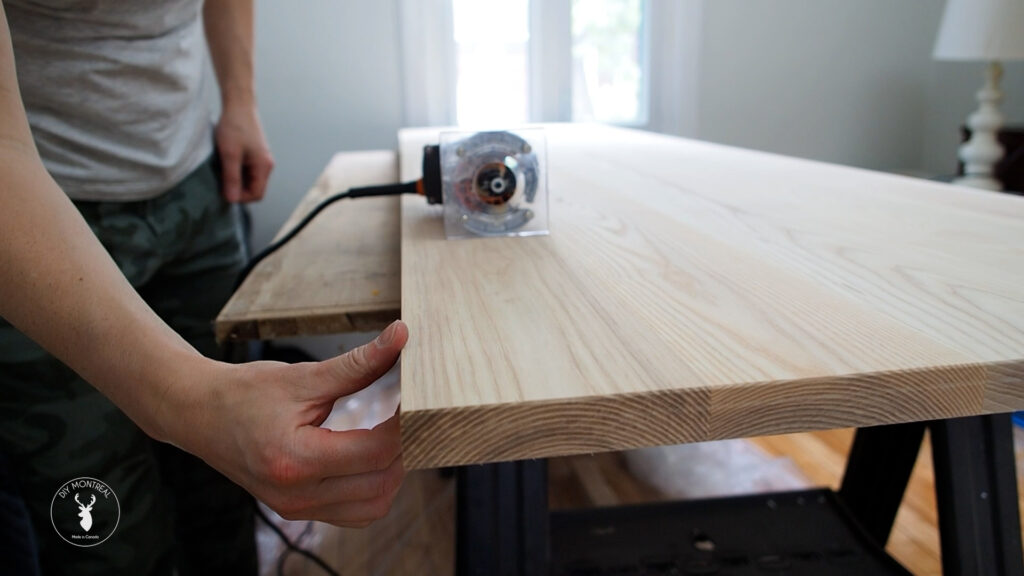
Perfectly square edges might look satisfying, but they’re not practical for furniture. Smooth edges are safer and give a more polished look. Here’s how to break those edges:
- Router: Use a round-over or chamfer bit for a smooth finish.
- Block Plane: Some woodworkers prefer using a small block plane for a more hands-on approach.
- Sanding Block: A quick rub with a soft sanding block can soften those edges to a smooth finish.
7. How to Cut Small Parts

Cutting small parts can be tricky and dangerous. Here’s how to do it safely:
- Avoid the Miter Saw: Small parts can be dangerous on a miter saw due to lack of support and the risk of kickback.
- Use a Crosscut Sled: A compact crosscut sled offers better control and support for small pieces. Hold-down clamps are essential for keeping fingers safe and pieces secure. Alternatively, I like to use the eraser tip of a pencil as a push stick when cutting small part on a crosscut sled.
8. How to Glue Up a Panel
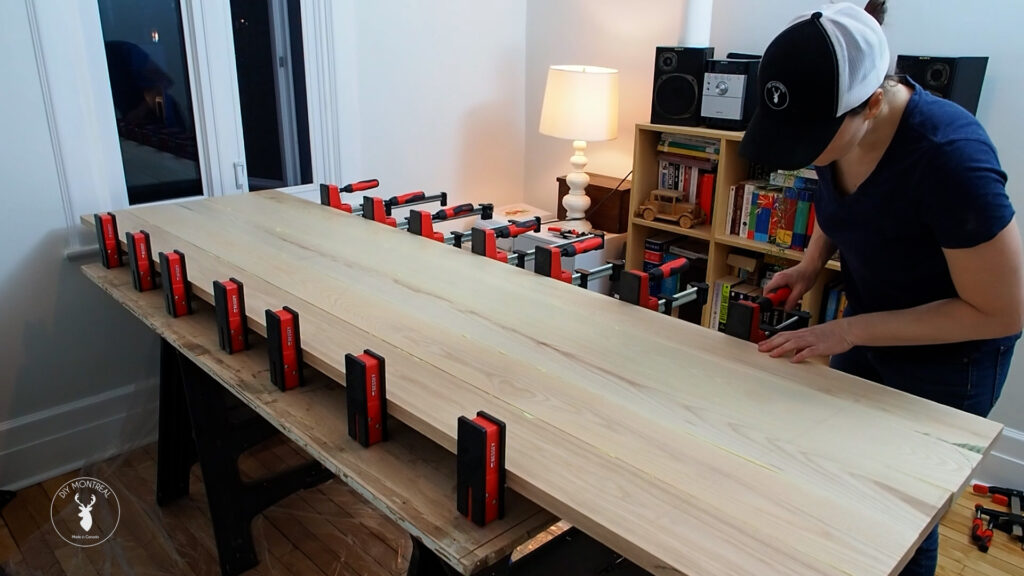
Panel glue-ups can be stressful, but here are some quick tips:
- Clamps: Use parallel clamps for even pressure. Don’t overtighten—just snug them up.
- Glue Application: Coat one edge fully with glue until you can’t see the grain. Look for small beads of glue squeezing out along the seams.
- Alignment: Use small clamps on board ends or clamping cauls to keep boards aligned.
9. Dealing with Glue Squeeze-Out
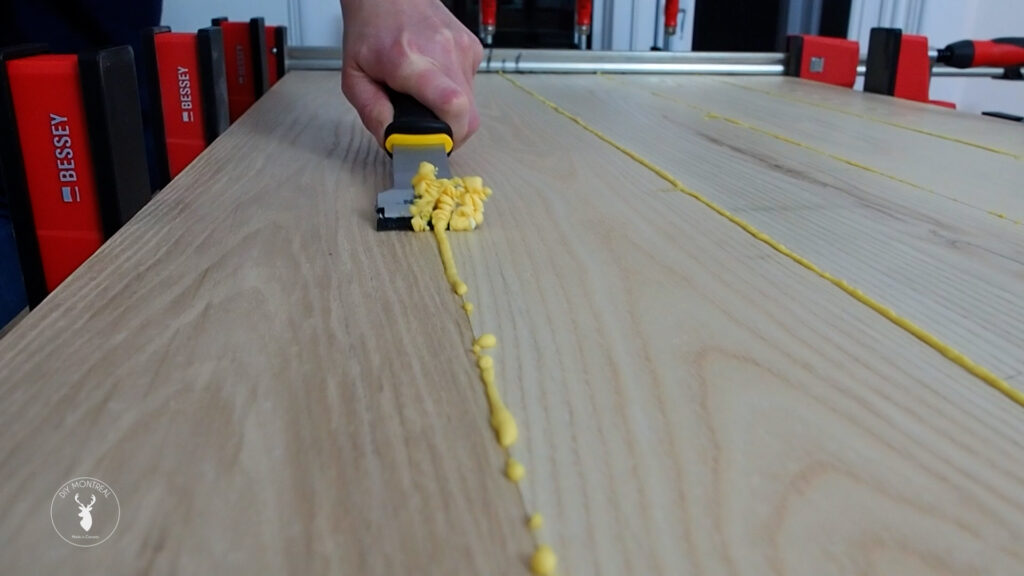
Glue and stain don’t mix. If glue gets on your wood, it can ruin your stain job. Here’s how to handle squeeze-out:
- Wipe It Away: Use a damp rag to wipe away excess glue before it dries. But be careful—too much water can cause swelling.
- Wait and Scrape: Let the glue dry, then scrape it off with a chisel or scraper. This minimizes the risk of staining issues later. However, there is a high risk of gouging the wood.
- Find the sweet spot: Wait 30-45 minutes for the glue to skin over. Then use a plastic scraper to remove the partially dried glue. This is the cleanest and most effective method that has become my go-to.
10. Cut Factory Ends
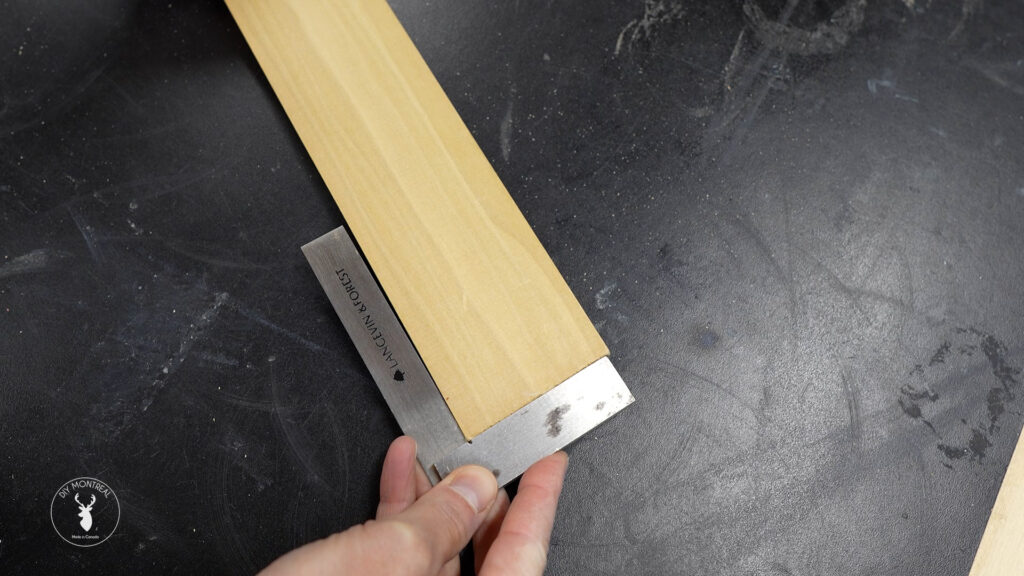
It’s easy to assume that the entire length of a freshly purchased board is usable. However, there’s a crucial step that often gets overlooked: cutting the factory ends.
Two Key Reasons to Trim the Ends
- Squaring Up the Board: If you place a square at the end of a board, you might be surprised to find that it isn’t perfectly square. To ensure your project comes together accurately, you’ll need to trim the ends of most boards to square them up properly.
- Dealing with Checking: Checking refers to the splits or cracks that can develop at the ends of a board as it dries. The ends of a board dry out faster than the middle, leading to these cracks. When you encounter checking, it’s best to cut off the affected area.
There you have it—10 more woodworking basics that will improve your skills and keep you safe in the workshop. If you haven’t already, be sure to check out my first basics video, linked below, for even more tips. Happy woodworking!